Ready to code your first Phonegap App with Mobile Angular Ui? In the following tutorial I will show you how. I will create a super simple Weather app, covering the basics of setting up and coding relevant part of it.
Prerequisites
You should have node and npm installed in your machine to follow this tutorial. We assume you can run your Phonegap application somehow (Android SDK, IOS Simulator, deploy to device).
Why not just Twitter Bootstrap and Angular Ui?
Well there is no problem using them as they are, except that they are not designed for mobile.
Bootstrap claims its stylesheets to be mobile-first, and yes they are, but this does not mean that it is ready for mobile. Touch browser/devices does not like :hover styles, and you'll have a lot of responsive stuffs you wont need at all in most cases.
Plus Bootstrap/AngularUi components are not designed to support a mobile interaction properly, as well as they leak some basic components often used in mobile development, i.e sidebars, scroll areas, switches and more.
Preparation
Installing required tools
npm install -g bower yo gulp generator-mobileangularui
sudo npm install -g phonegap
Scaffold the project
phonegap create weather
cd weather
yo mobileangularui
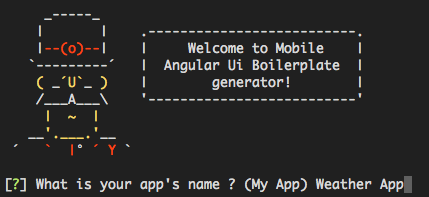
Be patient.. this may take a few minutes until npm finishes to install.
Build your project for the first time
gulp build
Run the application
Now to be sure that everything is ok let's try to run your app.
phonegap run ios # or android, or whatever is your target
If this is the first time you'll run phonegap with the choosen target it may complains about missing dependencies.. no fear, just install them and retry.
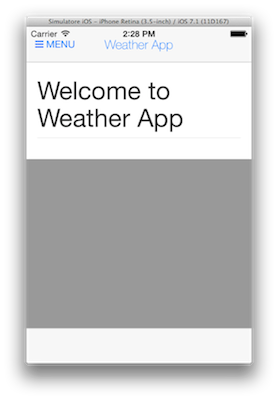
If everything went fine you should see something like this:
Coding your application
The project structure
After the installation is over your project folder should contain:
- Phonegap/Cordova stuffs
- Npm/Bower stuffs
- A ready to use
.gitignore wwwfolder that actually will contain compiled sources used by Phonegap/Cordova, you should never edit them directly.srcfolder that contains raw sources. Here is where you code your app.gulpfile.jsdescribing the build process for Gulpconfig.jsallowing to configure build process without editinggulpfile.js
Looking at the src folder now it should appear to be something like this:
src
├── html
│   └── index.html
├── images
├── js
│   ├── app.js
│   ├── controllers
│   │   └── main_controller.js
│   ├── directives
│   └── services
├── less
│   ├── app.less
│   ├── mixins.less
│   ├── responsive.less
│   └── variables.less
└── templates
    ├── home.html
    └── sidebar.html
Gulpfile and build process
Before to start hacking the scaffolded sources you may wish to know what happens when you run: gulp build. Well this is an explanation of what it does:
- Clean
wwwfolder for*.html,fonts,js,css,images(that's why you should not code there).config.xmlfromCordovais preserved. - Copy html files from
src/htmlfolder towwwroot - Copy vendor fonts to
www/fonts - Minify and copy images from
src/imagestowww/images - Compile and minify
app.lessandresponsive.less. Forapp.lessit also strips any responsive media query that wont match a screen of 0px and strip the :hover selectors (saved in a separate file), this will let you code for mobile only inapp.lessand support responsiveness elsewhere. This also allow to mobilize 3rd party stylesheets that are designed to be responsive and target non-touch devices too. - Concat vendor js (including angular and default deps),
src/js/**/*.js(automatically sorted according to angular dependency) and minify towww/js/app.min.jsusing a source map to help debugging.
Configuring/Customizing the build process
The build process is realized as a regular gulpfile.js. Anyway some common options are exposed through a config.js file.
config.js content is almost self-explanatory:
module.exports = function(config) {

  // Output directory
  config.dest = 'www';

  // Inject cordova script into html
  config.cordova = true;

  // Images minification
  config.minify_images = true;

  // Development web server

  config.server.host = '0.0.0.0';
  config.server.port = '8000';

  // Set to false to disable it:
  // config.server = false;

  // Weinre Remote debug server

  config.weinre.httpPort = 8001;
  config.weinre.boundHost = 'localhost';

  // Set to false to disable it:
  // config.weinre = false;

  // 3rd party components
  // config.vendor.js.push('.bower_components/lib/dist/lib.js');
  // config.vendor.fonts.push('.bower_components/font/dist/*');

};
Enough.. start to code!
Our app will:
- Retrieve our current position from device
- Perform an api call to an open service in order to get current weather (Just in case you can't look outside the window).
- Show the result
Wrapping deviceready event.
We could handle deviceready in many ways. For now we will just make it more angular-friendly isolating it in a service. deviceready will be exported as a function accepting a callback.
We will also make it cordova-agnostic invoking the callback immediately when cordova is not running.
This way we hopefully speed up development using a regular browser to test our app.
touch src/js/services/cordova.js
angular.module('WeatherApp.services.Cordova', [])

.factory('deviceReady', function(){
  return function(done) {
    if (typeof window.cordova === 'object') {
      document.addEventListener('deviceready', function () {
        done();
      }, false);
    } else {
      done();
    }
  };
});
Using Cordova Geolocation
Install the cordova plugin:
cordova plugin add org.apache.cordova.geolocation
Define a Geolocation module for geolocation related services:
touch src/js/services/geolocation.js
angular.module('WeatherApp.services.Geolocation', [
  'WeatherApp.services.Cordova'
])
Gulp will automatically take care of file ordering according to Angular module dependencies for us, so we can code without concerning about it.
Define a service to retrieve the current position:
.factory('getCurrentPosition', function(deviceReady, $document, $window, $rootScope){
  return function(done) {
    deviceReady(function(){
      navigator.geolocation.getCurrentPosition(function(position){
        $rootScope.$apply(function(){
          done(position);
        });
      }, function(error){
        $rootScope.$apply(function(){
          throw new Error('Unable to retreive position');
        });
      });
    });
  };
});
Here you may have noticed two thing:
$rootScope.$apply: since Cordova js yields to underlying native code callbacks will run in a different js turn (they are asynchronous for real), thus to make angular capture them in its event loop we have to resort to$apply.This code will work both in HTML5 web browser and in phonegap. This is due to the way we defined
deviceReadyand becausenavigator.geolocation.getCurrentPositionis part of HTML5 Geolocation API.
Requesting the Weather Forecast
For our example we will use a free api service from OpenWeatherMap.
Lets define another angular service to handle it.
touch src/js/services/forecast.js
angular.module('WeatherApp.services.Forecast', [])

.factory('getWeather', function($http){
  return function(lat, lng, done) {
    $http({method: 'GET', url: 'http://api.openweathermap.org/data/2.5/weather?lat='+lat+'&lon='+lng})
        .success(function(data, status, headers, config) {
          done(data.name, data.weather[0].description);
        })
        .error(function(data, status, headers, config) {
          throw new Error('Unable to get weather');
        });
  };
});
This time we don't need $apply cause $http handles it for us.
Put things together
Now that we have our service layer we can use it in our main controller.
angular.module('WeatherApp.controllers.Main', [
  'WeatherApp.services.Geolocation',
  'WeatherApp.services.Forecast'
  ])

.controller('MainController', function($scope, getCurrentPosition, getWeather){
  getCurrentPosition(function(position){
    getWeather(
      position.coords.latitude,
      position.coords.longitude,
      function(location, weather){
        $scope.location = location;
        $scope.weather = weather;
      });
  });
});
Displaying the results
Change home.html to make result appear:
<section class="section container-fluid">
  <div bs-panel title="\{{location}}">
    \{{weather}}
  </div>
</section>
Test/Debug in a Web Browser
Now that we have done with the code we wish to see our amazing and super-useful app in action.
Since we coded it wisely now we should be able to use a plain HTML5-ready web browser to test it.
Go back to our command prompt and issue:
gulp
Now we have built our source and have a web server listening on localhost:8000, a weinre server at localhost:8001, and a watch task rebuilding on code changes.
That said we can open http://localhost:8000/ to see the result of our hard work.
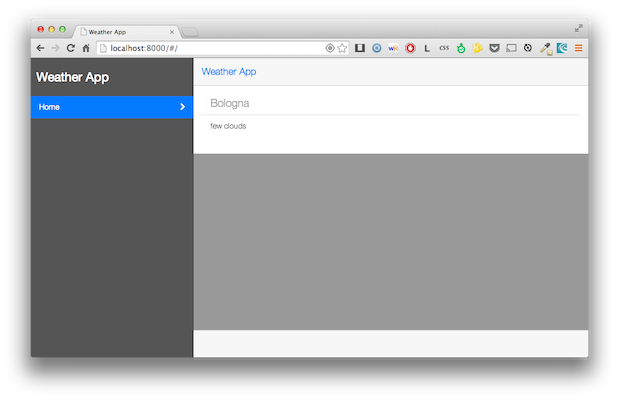
Be aware that the console should complain for a missing cordova.js. That's ok since we are not running cordova at all.
Test/Debug in Phonegap
Again run the default gulp task to build/watch sources and start weinre:
gulp
Then in a separate shell issue
phonegap run ios # or any other target
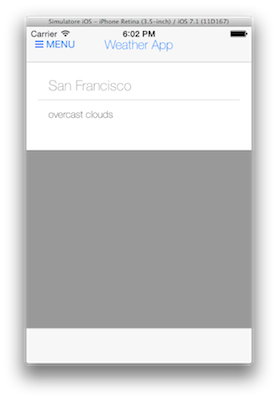
If everything went fine we should be able to see something like this now:
Debugging with Weinre
If errors arises running our app in Phonegap we can use Weinre to figure out what happened.
Mobile Angular Ui boilerplate ships with a gulp task for Weinre.
Running:
gulp weinre
or just the default
gulp
A weinre server is started at localhost:8001.
All we need to do is point a browser to that address and interact with our app through Weinre UI. Be aware that we have to wrap our code in try/catch and handle error logging manually in order to see runtime errors in Weinre.
Also we may experience problems with console.log/console.error as well.
A raw trick to overcome this is to have your error/messages stored in global vars we can dump at any time in weinre:
.controller('MainController', function($scope, getCurrentPosition, getWeather){
  try {
    getCurrentPosition(function(position){
      getWeather(position.coords.latitude, position.coords.longitude, function(location, weather){
        $scope.location = location;
        $scope.weather = weather;
      });
    });
  } catch(e) {
    window.error = e;
    console.error(e);
  }
});
Theming
This part will be covered in a separate tutorial. Stay up to date:
comments powered by Disqus